
Beaded Keychain and Charm Crafting with Friends Fun Designs Materials and Tips
A table full of beads has a funny way of turning into a table full of stories. Someone finds the perfect letter bead. Someone else spills a tiny pile of stars. Before long, everyone is comparing color combos, laughing over crooked first attempts, and making something small enough to carry every day.
Beaded keychains and charms are ideal for a relaxed craft night because they are simple, affordable, and easy to personalize. No one needs special skills to join in. A beginner can make a cute bag charm in under an hour, while a more confident crafter can play with patterns, layers, and tiny details.
Below, you’ll find the materials to gather, beginner-friendly tips, and step-by-step instructions for several designs you can make with friends.
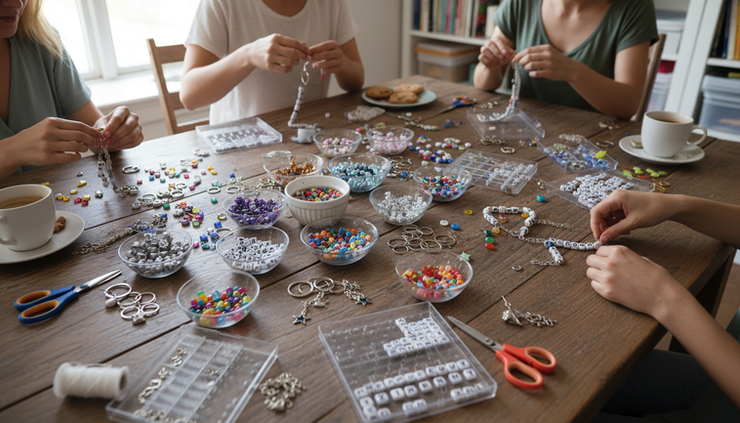
Gather simple supplies before everyone arrives
A good beading setup does not need to be fancy. The goal is to give everyone enough choices without turning the table into chaos.
Start with a few trays or shallow bowls so beads do not roll everywhere. Muffin tins, small plates, or divided snack trays work well. If you are crafting with kids, use larger beads and check that all parts are age-appropriate.
Here are the basics to have on hand:
Beads Pony beads, glass beads, acrylic beads, clay beads, alphabet beads, number beads, and shaped beads all work well.
Cord or stringing material Elastic cord is easy for stretch charms. Nylon cord, satin cord, waxed cord, and beading wire are useful for keychains.
Keychain hardware Split rings, lobster clasps, swivel clips, lanyard hooks, and jump rings give each design a finished look.
Tools Scissors, jewelry pliers, wire cutters, tape, and a ruler make the process much easier.
Extras Tassels, mini charms, bells, pom-poms, friendship charms, and letter beads add personality.
Glue A small dab of strong craft glue can help secure some knots, especially on nylon cord.
Work surface helpers Bead mats, towels, trays, or felt sheets keep beads from bouncing away.
If you are hosting, set up a “bead buffet” in the middle of the table. Put letter beads in one dish, colorful beads in another, and special charms in a separate area. This makes it easy for everyone to see what is available and build their own style.
For a smooth craft night, place a small trash bowl on the table too. It gives everyone a spot for cord scraps, packaging, and broken beads.
Set up a beginner-friendly craft station
The best beaded keychain and charm crafting with friends feels loose and fun, not fussy. A little prep helps beginners feel comfortable from the first bead.
Cut several pieces of cord ahead of time. For most keychains, 10 to 14 inches is enough. For bag charms with tassels or longer designs, cut 16 to 20 inches. It is better to trim extra cord at the end than to run out halfway through.
Use tape to secure one end of the cord to the table. This keeps beads from sliding off while someone works. You can also clip the end with a binder clip or tie a temporary stopper bead.
A few quick beginner tips make a big difference:
Plan the pattern first Lay beads on the table before stringing them. This helps with spacing and color balance.
Use odd numbers Groups of 3, 5, or 7 beads often look balanced without much effort.
Mix sizes carefully Put larger beads near the center or bottom so the charm hangs nicely.
Test the hardware Make sure the clasp, ring, or clip opens and closes before tying everything off.
Pull knots snug Loose knots are the most common reason charms come apart.
Keep it lightweight Heavy charms can tug on backpacks, purses, and zipper pulls.
Encourage everyone to make a practice piece first. It can be tiny, silly, or imperfect. Once the pressure is gone, the good ideas usually show up.
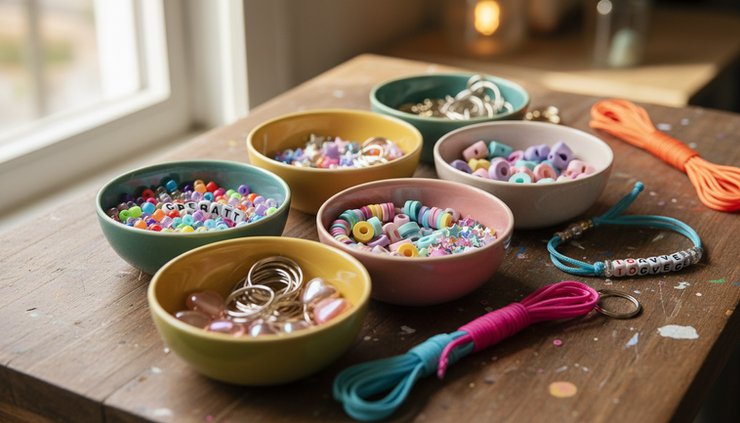
Make fun beaded keychain and charm designs together
These designs are easy to adjust based on the beads you have. Try one as written, then invite everyone to change the colors, initials, symbols, or length.
Make a classic name keychain
A name keychain is the perfect starter project. It works well for names, initials, nicknames, team names, or short words like `JOY`, `LUCKY`, or `BESTIE`.
Materials
Alphabet beads
Pony beads or round beads
Nylon cord or elastic cord
Key ring or lobster clasp
Scissors
Craft glue
Steps
Cut the cord
Cut a piece of cord about 12 inches long. Fold it in half to find the center.
Attach the key ring
Loop the folded center through the key ring. Pull the two loose ends through the loop and tighten. This makes a simple lark’s head knot.
Plan the word
Lay out the letter beads in order. Add colored beads on both sides so the name stands out.
String both cord ends
Thread beads onto both ends together if the bead holes are large enough. If not, use one end and keep the other beside it.
Finish the end
Tie the loose ends in a tight double knot. Add a tiny dab of glue if needed.
Trim the cord
Cut the extra cord close to the knot, but leave enough so the knot stays secure.
Try matching the colors to a backpack, school colors, a favorite sports team, or a friend’s favorite snack wrapper. Tiny sources of color inspiration often lead to the cutest designs.
Make a friendship charm pair
Friendship charms are even better when they connect in some way. They can match exactly, use opposite colors, or share a tiny theme.
Materials
Two lobster clasps or key rings
Matching beads in two color palettes
Letter beads
Heart, star, or moon beads
Elastic cord or nylon cord
Scissors
Steps
Choose a shared theme
Pick something both friends like. Ideas include sun and moon, pink and red hearts, ocean colors, favorite initials, or matching smiley beads.
Cut two cords
Cut two equal pieces of cord, each about 12 inches.
Attach the clasp
Tie or loop each cord onto its own clasp.
Build the first charm
Add a short bead pattern. Keep it light so it hangs well.
Repeat with a twist
Make the second charm similar, but not identical. Switch the main color or reverse the pattern.
Tie and secure
Knot each charm tightly. Add glue if the cord is slippery.
A sweet idea is to add one letter bead from each person’s initial. Another option is to use the same center bead on both charms so they feel connected, even if the colors are different.
Make a fruit slice charm
Fruit designs are cheerful, simple, and great for summer bags or zipper pulls. Watermelon is one of the easiest because the colors are clear and bold.
Materials
Green beads
White beads
Pink or red beads
Black seed beads or small black beads
Cord
Key ring or clip
Scissors
Steps
Attach the cord to hardware
Loop or tie the cord onto a key ring or clip.
Start with the rind
Add 2 or 3 green beads, then 1 or 2 white beads.
Add the fruit color
Add several pink or red beads to create the main part of the watermelon.
Place the seeds
Add a small black bead after every few pink or red beads.
Repeat the pattern
Continue until the charm is 2 to 3 inches long.
Finish with a knot
Tie the end securely and trim the extra cord.
For a lemon charm, use yellow and white. For a strawberry charm, use red, green, and a few tiny white beads. The pattern does not need to be exact. If it reads as fruit, it works.
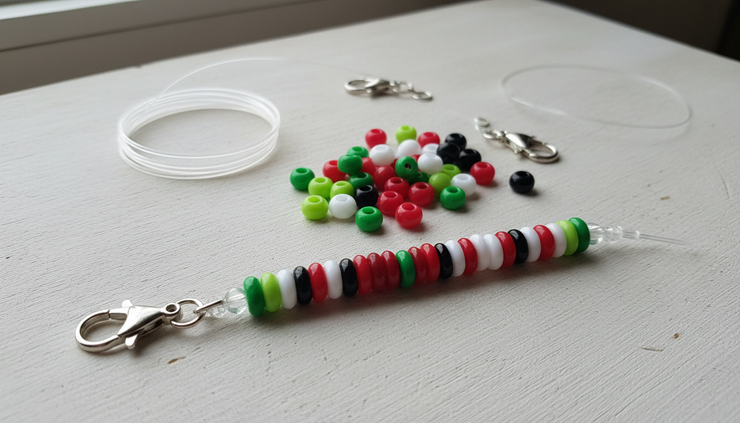
Make a stacked bag charm
A stacked charm has more movement than a single strand. It works well on purses, tote bags, gym bags, and backpacks.
Materials
One large clasp or key ring
2 to 3 short pieces of cord
Mixed beads
Tassel or small charm
Jump rings
Pliers
Scissors
Steps
Choose a main color palette
Pick 2 or 3 colors so the finished charm looks pulled together.
Make the first strand
String 5 to 8 beads on a short cord. Tie it to the main clasp.
Make the second strand
Use smaller beads or a different pattern so it does not look too bulky.
Add a tassel
Use a jump ring and pliers to attach a tassel to the main clasp.
Check the length
Hold the charm up and make sure the strands hang at slightly different lengths.
Tighten everything
Pull knots snug and trim the ends.
This is a great group project because everyone can trade beads. One person might have extra stars, another might have the perfect gold spacer beads, and someone else might donate a tassel.
Make a zipper pull charm
Zipper pulls are small, fast, and useful. They are perfect for jackets, pencil pouches, lunch bags, makeup bags, and craft cases.
Materials
Small lobster clasp
Thin cord or beading wire
Small beads
One focal bead
Scissors or wire cutters
Pliers if using wire
Steps
Cut a short strand
Use about 8 inches of cord or wire.
Attach it to the clasp
Tie the cord to the clasp or loop wire through it.
Add a focal bead
Place a special bead near the bottom. A heart, star, mushroom, flower, or animal bead works well.
Add small beads above it
Use smaller beads so the pull stays lightweight.
Secure the end
Knot cord tightly or finish wire with a wrapped loop.
Clip it on
Attach the charm to a zipper and test that it is easy to pull.
These tiny charms are great for people who like quick wins. Make a few extras and keep them as small gifts.
Crafting together makes the project more meaningful
Beaded charms are fun on their own, but making them with friends adds another layer. The finished keychain becomes a reminder of the time spent choosing colors, swapping ideas, and cheering each other on.
Crafting together creates easy conversation. Hands are busy, so the mood feels relaxed. There is no need to force a perfect activity or keep everyone on the same schedule. Someone can sort beads. Someone can make three charms. Someone can simply sit, chat, and make one tiny zipper pull.
It also sparks creativity in a natural way. One person’s color choice may inspire another person’s pattern. A leftover charm can become the centerpiece of a new design. A mistake can turn into a funny inside joke or a better idea.
Group crafting also makes supplies go further. Instead of everyone buying full packs of every bead, friends can bring what they already have and share. One person might bring alphabet beads, another brings clasps, and another brings tassels. The mix often creates better designs than a perfectly matched kit.
To make the gathering feel special, try one of these simple ideas:
Set a theme, such as beach day, favorite colors, pets, or friendship charms.
Play a relaxed playlist in the background.
Put finished charms in a bowl and let everyone admire the collection.
Make an extra charm for someone who could use a small surprise.
Take a group photo of everyone holding their creations.
The best part is that every charm carries a little bit of the group’s personality.
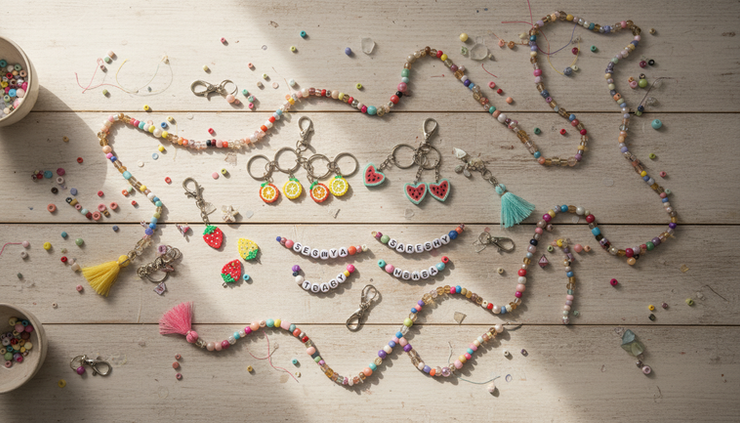
Finish, store, and share your creations
A few finishing touches help handmade charms last longer. Before calling a piece done, tug gently on the cord and hardware. If anything slips, retie it. If the knot feels loose, add a tiny dab of craft glue and let it dry fully.
For elastic cord, use a surgeon’s knot if you know how, or tie several snug knots. For nylon cord, a square knot or double knot works well. For beading wire, use crimp beads if you have them. If not, stick with cord for beginner projects.
Store extra beads in divided containers, small jars, or resealable bags. Labeling by color or type saves time at the next craft night. Keep sharp tools, glue, and tiny beads away from small children and pets.
When your charms are finished, share them in whatever way feels fun:
Clip one to a backpack or tote.
Swap charms with a friend.
Add one to a gift bag.
Make matching keychains for a club, team, or book group.
Start a small charm collection on a key ring.
Take photos before everyone takes their designs home.
If sharing online, include a few notes about the beads, colors, or pattern you used. People love seeing the story behind handmade pieces. A simple “we made these during movie night” or “each charm uses our favorite colors” makes the post feel personal.
You can also invite friends to share their own tips. Someone may discover a better knot, a clever way to organize letter beads, or a color combo everyone wants to copy next time.

A beaded keychain may be small, but the experience can feel surprisingly memorable. Gather a handful of beads, invite a few friends, and let everyone make something that fits their own style. Keep the mood easy, celebrate the imperfect pieces, and take pictures of the finished charms before they scatter onto keys, bags, and zippers.
The next craft night does not need to be complicated. It just needs a table, some beads, and people who are happy to make something together.
Comments